I recently finished a Flying Geese Quilt, which I named Flight....
I love the Flying Geese block. It is very versatile.
It works great in a pillow....
As a border....
or even in minature....
What a great block! There are many methods for making this block. Today I want to share with you a few of them...
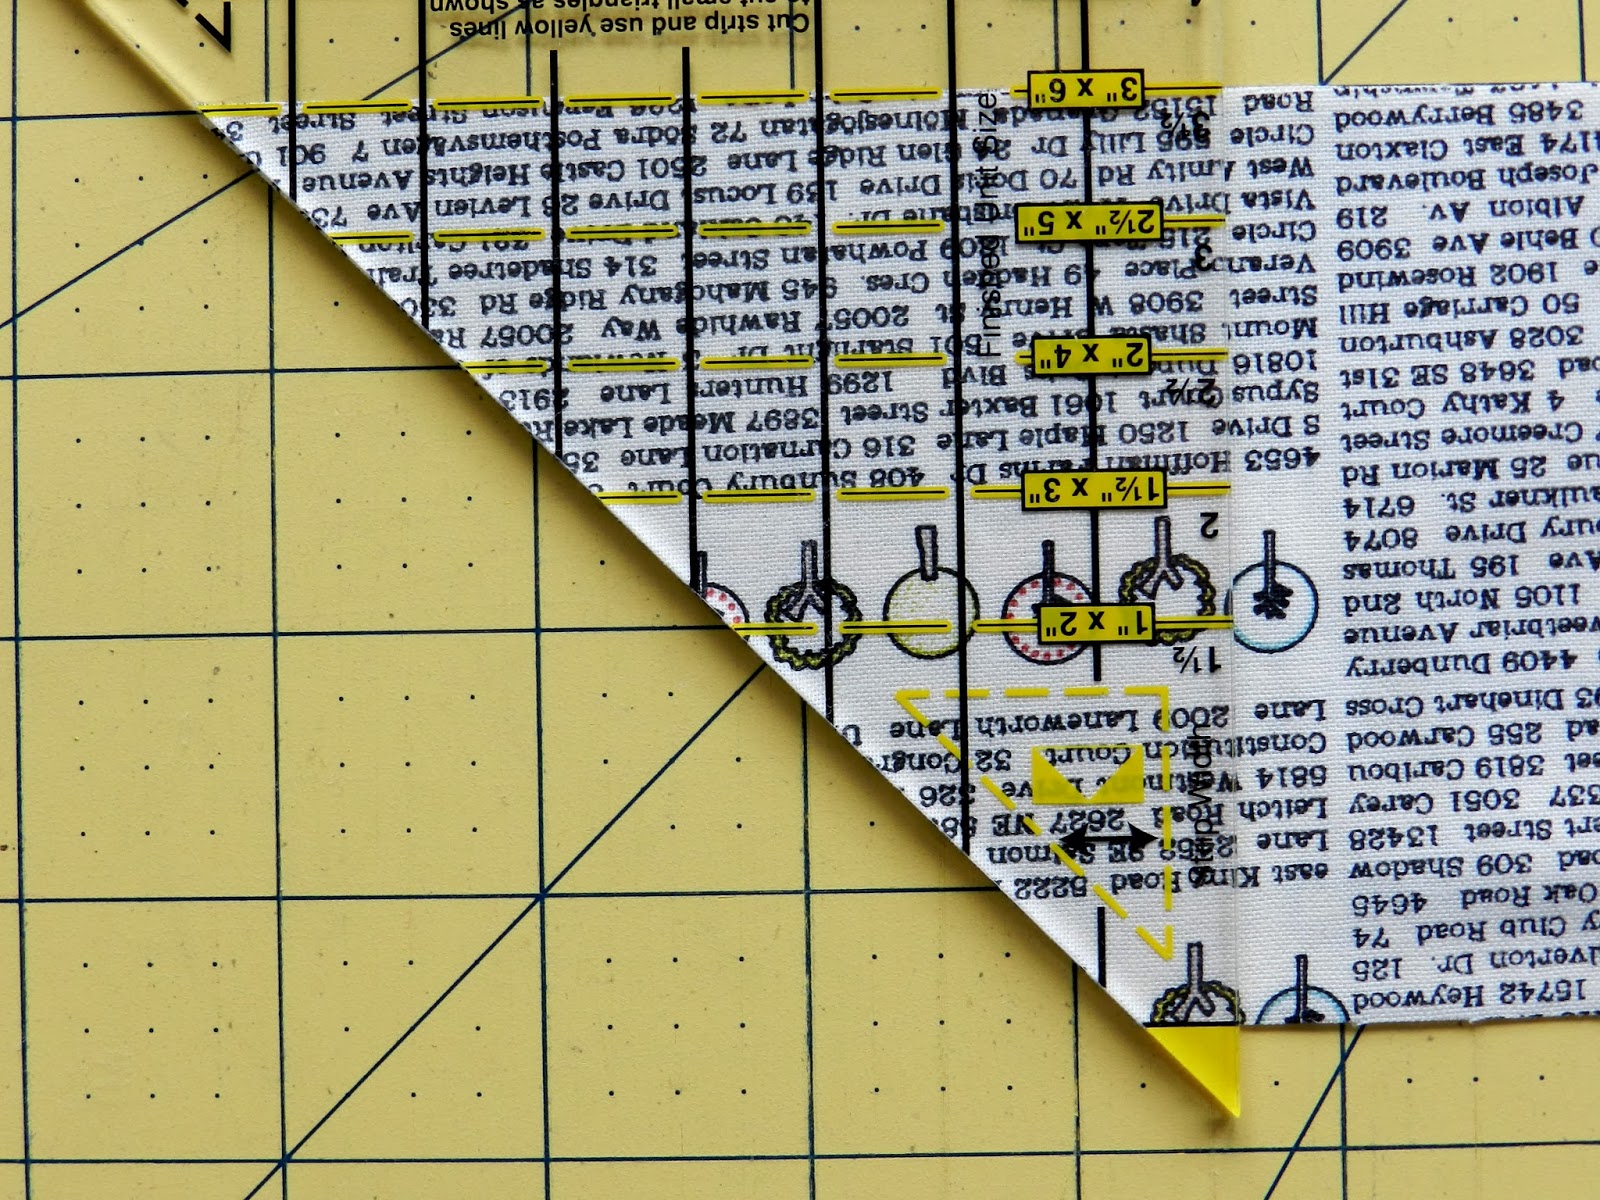
First up we will use the Fons and Porter Flying Geese Ruler....
For my quilt, I used a 3 X 6 block. In fact, I foundation paper pieced my block which consisted of two geese. So my block finished as a 6 X 6 inch block.
For each method described here I will be making a 3 X 6 inch block.
To use the Fons and Porter ruler, I cut a strip for the big triangle 3.5 inches by the width of fabric....and a strip for the small side units, also, 3.5 inches by the width of fabric.
To make the side units I line up my ruler with the blunted off point even with the top of my strip and the 3.5 inch mark at the bottom edge of my strip. The first cut is just to get the angle of my unit.
After I make this first cut, I can flip the ruler and use the previous cut edge so there is no waste!
Now we need to cut the center triangles....
I line the middle of the ruler up with the edge of my fabric strip...again just to get the angle so I can cut, flip and cut.
Make sure the bottom edge of the shaded point is against the top edge of your fabric strip. these blunted tips help with lining up the pieces when you go to sew them together....
now with right sides together line up the blunted tip of the side unit with the blunted tip of the center triangle...
stitch both side units, one at a time, using a 1/4 inch seam allowance and press the block open.
When you are attaching Geese blocks into a row....be careful to stitch just shy of the point where the two units cross to preserve your point....you want those geese nice and pointy!
The next method is the one I most often use, foundation paper piecing.
I have a foundation paper pattern measuring a finished 6 X 6. Each individual block is 3 X 6.
Begin by cutting two large rectangles 4" X 7" and four smaller rectangles 4" X 4.5 "
Take a large rectangle and place it with the wrong side against the wrong side of paper pattern...you can use a dab of glue to hold it in place if it helps.
Now trim the right edge, leaving a 1/4 inch seam allowance...
Place a smaller rectangle so the raw edges are even....and stitch on the drawn line....
Note: it is a good idea to reduce the stitch length to about 1.5 so the stitches don't come loose when tearing away the paper.
Fold back the paper on the stitched line and cut away the excess fabric from the smaller rectangle - leaving a 1/4 inch seam allowance.
Note: to make it easier to fold back the paper on the line, you can either pre-fold the paper before you begin or lightly score the paper with the back of your seam ripper.
Repeat this process on the other side of the large center triangle.
Now you are ready to add the other rectangle to the top of this first Flying Geese unit...
Before you begin stitching the next large rectangle to the previous unit...fold the paper pattern back on the line dividing the two Flying Geese and trim leaving a 1/4 inch seam allowance.
Repeat the steps described above. After you have the second Flying Geese block added, flip the block over and trim around the block leaving a 1/4 inch seam allowance on each side. Then carefully tear away the paper.
The next method is fabulous and a very close second to my favorite foundation paper piecing method...
I have seen several tutorials on this method, but I really like the one posted by Shannon of Pieceful Kwilter....you can find it here
I will just briefly describe this method, but I would really encourage you to check it out on her blog. It is a great method and the best thing is, you get 4 units....I like anything that makes the piecing even faster!
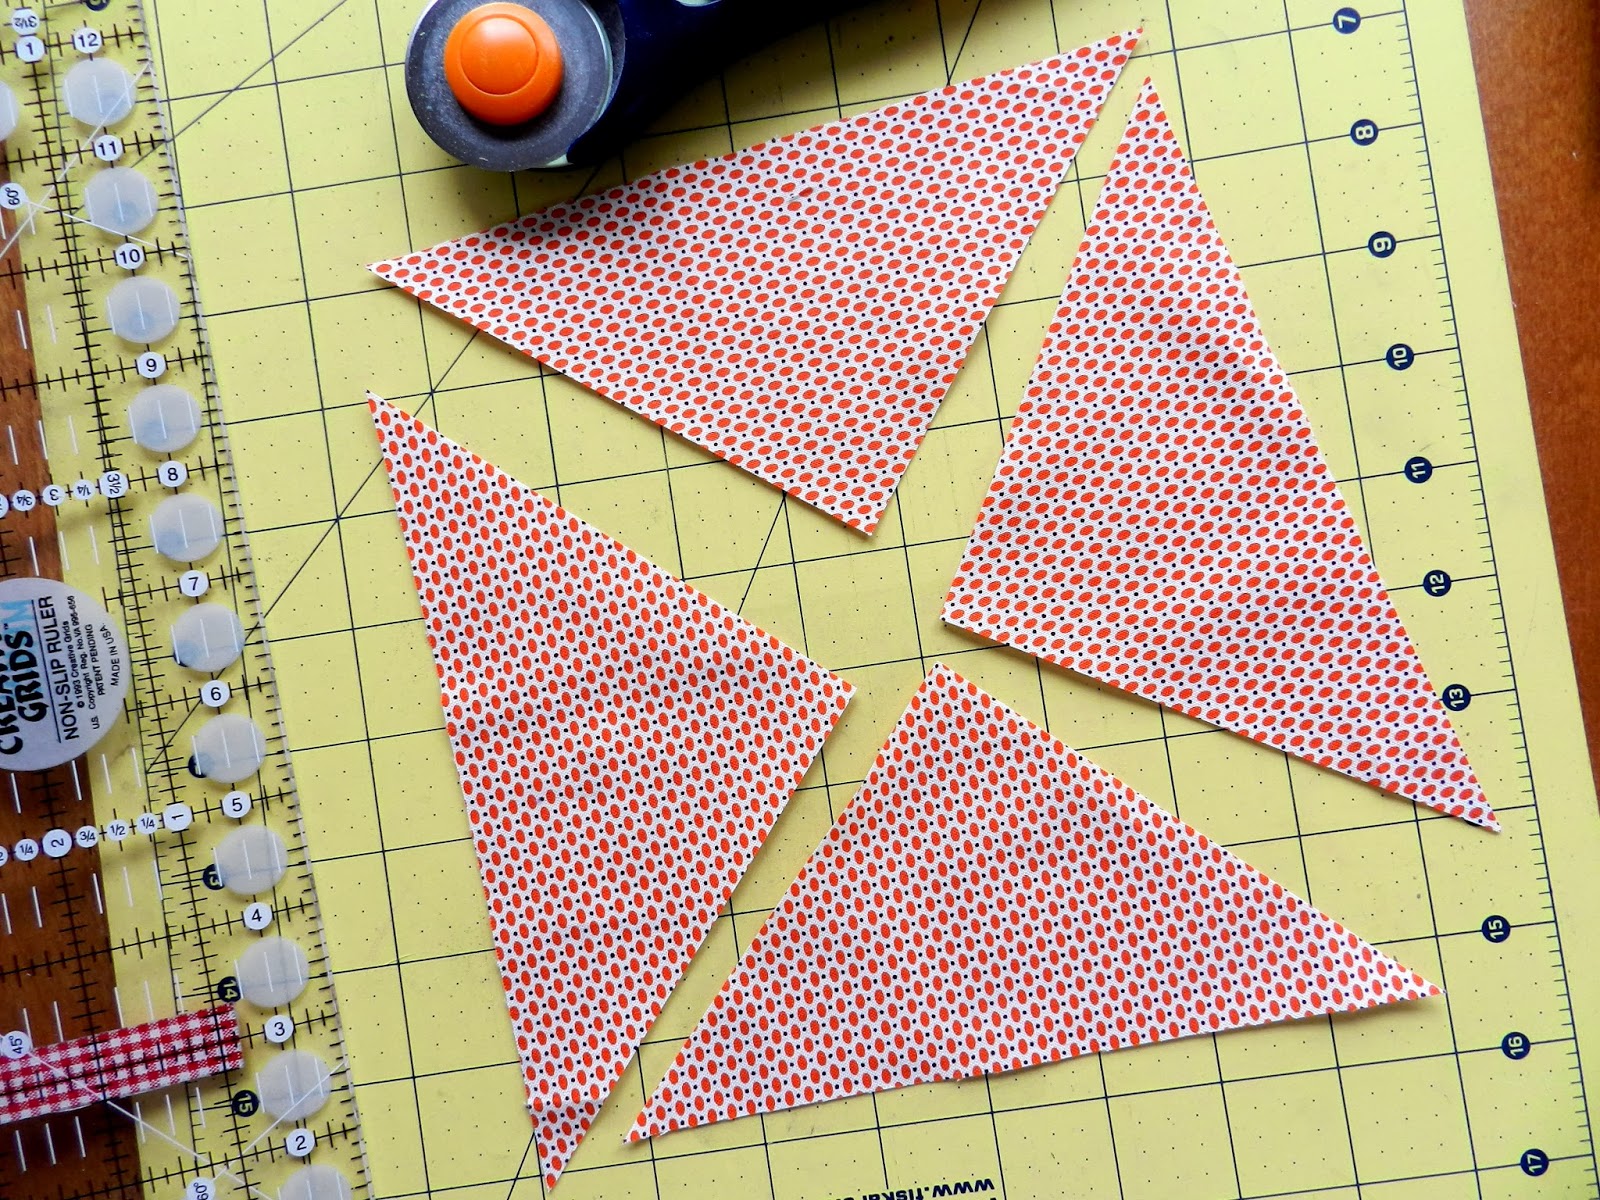
For my Flying Geese, I would cut one large square 7.25 inches X 7.25 inches....
and cut 4 smaller squares 3 7/8 inches X 3 7/8 inches.
Draw a diagonal line from one corner to the opposite corner on each of the smaller squares.
Place one smaller square on the upper left hand corner of the larger square and another smaller square on the bottom left hand corner of the larger square. Pin in place.
Stitch a 1/4 inch from each side of the drawn line....corner to corner...
then cut apart on the drawn line...
you will end up with something that looks like a heart shape!
Take the other two smaller squares and place one on each of the remaining points on the larger "heart" shape....
again, stitch 1/4 inch from the drawn line (both sides) and then cut on the drawn line...
I have to say, this is a great method and Shannon explains it very well...so be sure to visit her at the Pieceful Kwilter!
Are you still with me?
The last method is also a paper foundation method from Triangles on a Roll....you can find this product at www.trianglesonaroll.com
With this method you cut a large square 7.25 inches and sub cut the square on the diagonal twice.....
then cut a smaller square 3 7/8 inches and sub cut once on the diagonal...you will need 4 of these squares to add to each of the larger triangles above....
From the roll, cut as many triangles as you wish to make...I will cut two.
Place the large triangle in the blue shaded area on the paper. The difference between this and more traditional paper piecing is that the paper will always be on the bottom...
Place the smaller triangle on the left side....and stitch...
Repeat on the other side of the larger triangle...
Now add another larger triangle to the top and repeat the previous steps...
Once you have finished all the triangles you want to add, carefully tear away the paper!
Sorry for the long post! I thought it would be nice to have all of these methods in one spot...
if you have a Flying Geese method you like, please share! I would love to hear if you use one I have shared here or if there is another that you prefer!
happy wednesday!
mary


